Virtual Appliance
You can use Planemo as part of a Galaxy tool development virtual appliance which comes pre-configured with Planemo, Galaxy, Docker, Conda, a local Tool Shed, linuxbrew, Komodo and Atom editors.
Quick Links
If you already know what to do. Otherwise please read on.
Planemo OVA image: https://images.galaxyproject.org/planemo/latest.ova
docker run -p 8010:80 -p 9009:9009 -v `pwd`:/opt/galaxy/tools -i -t planemo/interactiveThis assumes your tools are in your current working directory (replace `pwd` with a path to your tools if this is not the case).
The Setup
The Galaxy instance that runs in these appliances has been optimized for tool
development - Galaxy will monitor your tool directory for changes and reload
the tools as they are modified, the server will directly log you into Galaxy
as an admin (no need to worry about user management or configuration), Galaxy
is configured to use a PostgreSQL database, and execute jobs via SLURM for robustness. If something goes
wrong and Galaxy needs to be restarted manually - run restart_galaxy
from the command-line.
The virtual appliance is available in four flavors via open virtualization format (OVA, .ova), Docker, Vagrant, and as a Google Compute Engine cloud image.
The OVA image is a stable way to boot a Planemo virtual machine on any platform and comes with a pre-configured Xubuntu-based windowed operating system with graphical editing tools including Komodo and Atom editors. This approach can be thought of more as a complete environment and may be better for tutorials and workshops where consistent user experience is more important.
The Docker and Vagrant versions make it trivial to mount an external directory in the appliance so that one can use their own development tools (such as editors). These can be used in traditional development environments with existing tools and will probably be the preference of power users whereas.
The Google Compute Engine variant is ideal when local compute resources are unavailable or insufficient.
Launching the Appliance
The following sections will describe how to launch the appliance using various platforms.
Launching the Appliance (VirtualBox - OVA)
The VirtualBox OVA variant of the Planemo appliance comes preconfigured with a full windowed development environment (based on Xubuntu). Encompassing the complete environment means it is easier to setup and provides an identical experience for every developer using it. These make the OVA image ideal for tutorials and workshops.
The latest VirtualBox version of the planemo appliance can be found here.
Please download and install VirtualBox. When VirtualBox has been installed - the planemo machine can be imported by downloading the latest image and double clicking the resulting file. This should result in VirtualBox being opened to an import screen. Just follow the prompt and the machine should become available.
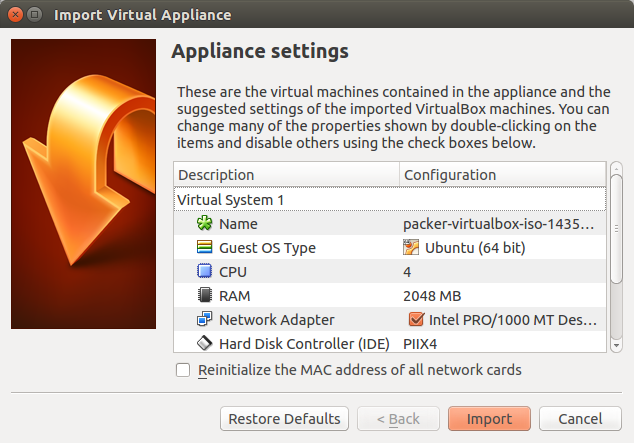

When the import is finished (and before starting the VM), right-click on the new appliance and select “Settings”:
in the “General” -> “Advanced” tab, select “Bidirectional” for “Shared Clipboard”
in the “Display” -> “Screen” tab, tick “Enable 3D Acceleration”
in the “Network” -> “Adapter 1” tab, select “PCnet-FAST III (Am79c973)” as “Adapter Type”
Click the “OK” button
Now start the appliance by clicking the “Start” button.
The Firefox browser, Komodo and Atom editors, Galaxy, Planemo and everything else is available right away on the desktop along with useful links.
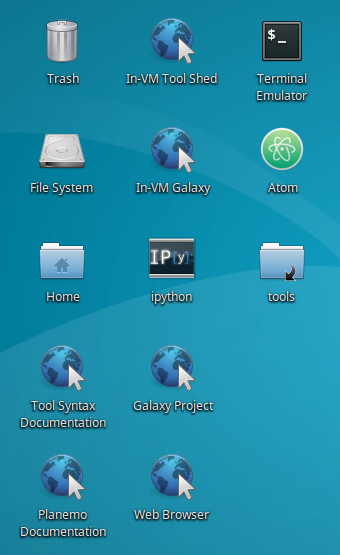
In-VM Galaxy runs at http://localhost and the In-VM Tool Shed at http://localhost:9009.
Various relevant applications are available under the Xubuntu menu which has the following icon.
Launching the Appliance (Docker)
There are two variants of the Docker appliance - one is specifically designed for Kitematic a GUI application available for Mac OS X and Windows that claims to be “the easiest way to start using Docker” and the other is designed to be used with a command-prompt available under Linux or in Mac OS X and Windows when using boot2docker.
Server Edition (for Kitematic)
To get started with Kitematic, please download it if it hasn’t been previously installed and then launch it.
Wait for Kitematic to load and search for planemo/server.
Once Kitematic has downloaded, you can use the search bar at the top to locate planemo/server
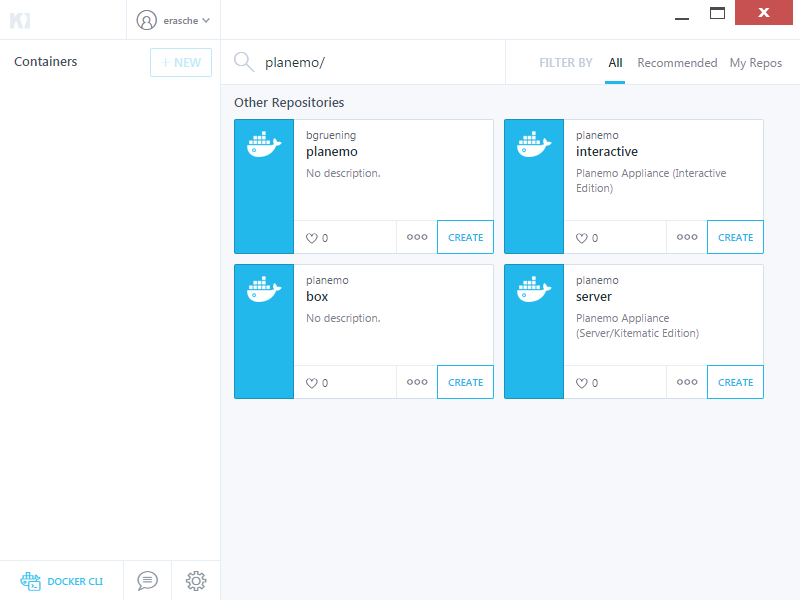
There may be several Planemo containers discovered - be sure to pick the planemo/server one with the experience optimized for Kitematic. Choose to create this image and it will download.
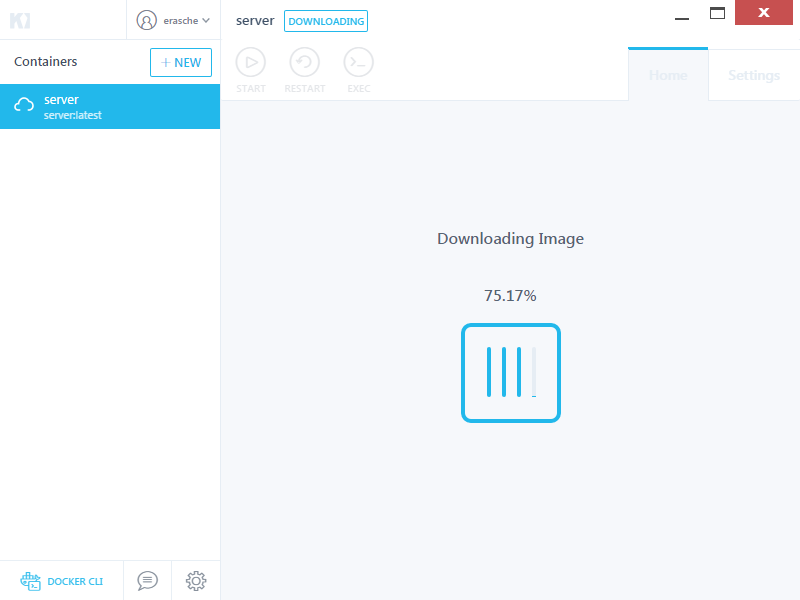
After a minute or so, you should see logs for the running container appear in the main window.
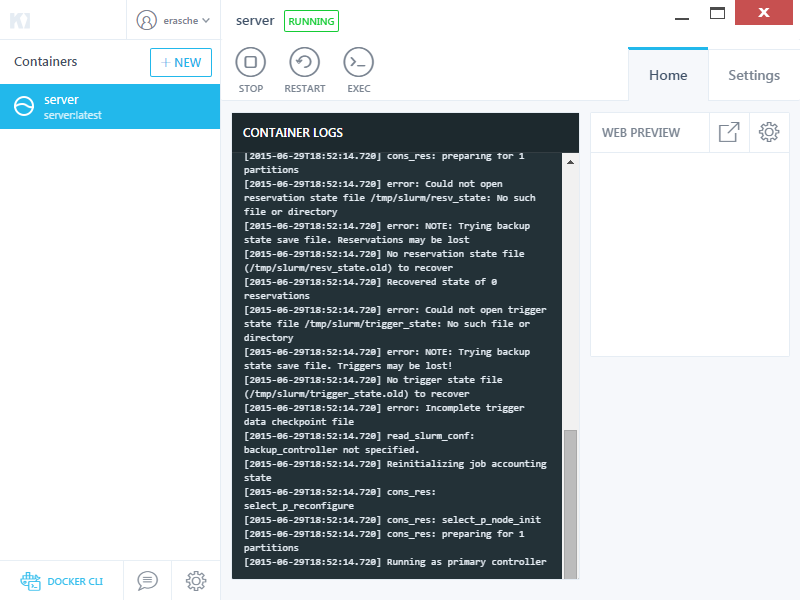
Galaxy will now be available by clicking the link in the Web Preview section of the GUI.
Clicking the Exec button in the container’s tool bar (at the
top, middle of the screen) will launch a root command-prompt. Planemo is
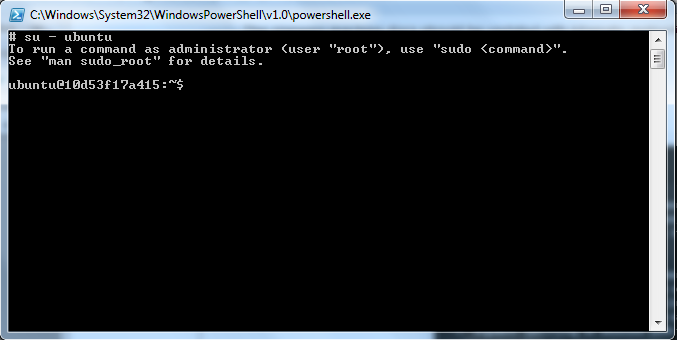
configured for the ubuntu user - so the first thing you should do is
launch an ubuntu login session by entering the command su - ubuntu.
Interactive Edition
The interactive edition of the Planemo Docker image is designed for
environments where the docker command-line tool is available. This can
easily be installed via package managers under Linux - but for Windows and Mac
OS X - boot2docker should be installed and launched in order to run these
commands.
The Docker version of the planemo appliance can be launched using the following command (which will pull the appliance down from Docker Hub).
$ docker run -p 8010:80 -p 9009:9009 -v `pwd`:/opt/galaxy/tools -i -t planemo/interactive
This command will start Galaxy and various other services and then open a bash shell with Planemo available. This assumes your tools are in your current working directory (just replace `pwd` with a path to your tools if this is not the case).
Docker commands such as ps and kill can be used to manage this Docker
container.
This Docker environment will contain your tools and modifications made to them will be made directly to your filesystem - so they are persistent. Data loaded into the Galaxy instance (history data for instance) will be lost when the Docker container is stopped. Check out the docker-galaxy-stable project for information on running persistent Galaxy processes in Docker.
Launching the Appliance (Vagrant)
The image for this way of launching the appliance is outdated. Please use a different one.
The latest Vagrant version of the planemo appliance can be found
here. Once you have
installed Vagrant (download now),
the appliance can be enabled by first creating a Vagrantfile in your tool
directory - the following demonstrates an example of such file.
VAGRANTFILE_API_VERSION = "2"

Vagrant.configure(VAGRANTFILE_API_VERSION) do |config|
  config.vm.box = "planemo"
  config.vm.box_url = "https://images.galaxyproject.org/planemo/latest.box"
  config.ssh.username = "ubuntu"

  # Forward nginx and tool shed.
  config.vm.network "forwarded_port", guest: 80, host: 8010
  config.vm.network "forwarded_port", guest: 9009, host: 9009

  # Disable default mount and mount pwd to /opt/galaxy/tools instead.
  config.vm.synced_folder ".", "/vagrant", disabled: true
  config.vm.synced_folder ".", "/opt/galaxy/tools", owner: "ubuntu"

  # config.vm.provider "virtualbox" do |vb|
  #   # Don't boot with headless mode
  #   vb.gui = true
  #
  #   # Use VBoxManage to customize the VM. For example to change memory:
  #   vb.customize ["modifyvm", :id, "--memory", "1024"]
  # end
end
This file must literally be named Vagrantfile. Next you will need to
startup the appliance. This is as easy as
$ vagrant up
Once the virtual server has booted up completely, Galaxy will be available at http://localhost:8010, the Codebox IDE will be available http://localhost:8010/ide/, and the local Tool Shed at http://localhost:9009.
Launching the Appliance (Google Compute Engine)
The image for this way of launching the appliance is outdated. Please use a different one.
The GCE version of the appliance is different in that it doesn’t run locally on your computer, but on a remote ‘cloud’ machine. Using this variant of the appliance requires a Google Cloud Platform account with an active payment method.
The first thing you’ll want to do is get the gcloud administration utility installed and configured. Once you’ve installed gcloud, you can authenticate and (optionally) set your default project, zone, and region (example below, but you should choose whatever region and zone are appropriate for your location). If you set these defaults, you will not have to supply them to all subsequent commands.
$ gcloud auth login
$ gcloud config set project YOUR-PROJECT-NAME
$ gcloud config set compute/region us-central1    (replace us-central1 with another region if desired)
$ gcloud config set compute/zone us-central1-f    (same for the zone us-central1-f)
Import the image to your account with the following statement. This will only need to be done one time, unless you delete the image from your account.
$ gcloud compute images create planemo-machine --source-uri=http://storage.googleapis.com/galaxyproject_images/planemo_machine.image.tar.gz
To launch the image as a fresh instance, use the following command. This command will, upon completion, display an external ip address that you can navigate to in your web browser.
$ gcloud compute instances create planemo --machine-type n1-standard-2 --image planemo-machine --tags http-server
If you’d like to SSH in to the instance at this point, it’s easy to do with:
$ gcloud compute ssh planemo
Building the Appliance
These appliances are built using the planemo-machine project which can be used to build customized recipes of this nature or even appliance for cloud environments such as Amazon Web Services and Google Compute Engine.